:max_bytes(150000):strip_icc()/spruce-crafts-header-illo-1fcc1cb416554246b2063d9fe26fb24f.png)
How to Sew a Dog Bone Toy
:max_bytes(150000):strip_icc()/DogBoneToy1-5a9b16ad0e23d90037550882.jpg)
The Spruce / Mollie Johanson
Your dog is a special friend who deserves the best, and that includes a handmade dog bone toy. This free dog bone pattern is easy to sew and should only take you about a half hour to complete. When you sew dog toys, you get to choose the materials and color scheme and tailor them to your pet's size. This dog bone pattern comes in two sizes for large and small dogs. Besides making one for your own pup, a DIY dog bone can be a great personalized gift for family and friends who have canine companions.
What You'll Need
Equipment / Tools
- Scissors
- Pins
- Sewing machine
Materials
- 1/4 yard outer fabric (sherpa, flannel, quilting cotton, or any strong but soft material)
- 1/4 yard inner fabric (well-shrunk muslin or another tightly woven material)
- Matching thread
- Stuffing
- Optional: A small container with dried peas or beans in it to make a rattle noise
Instructions
-
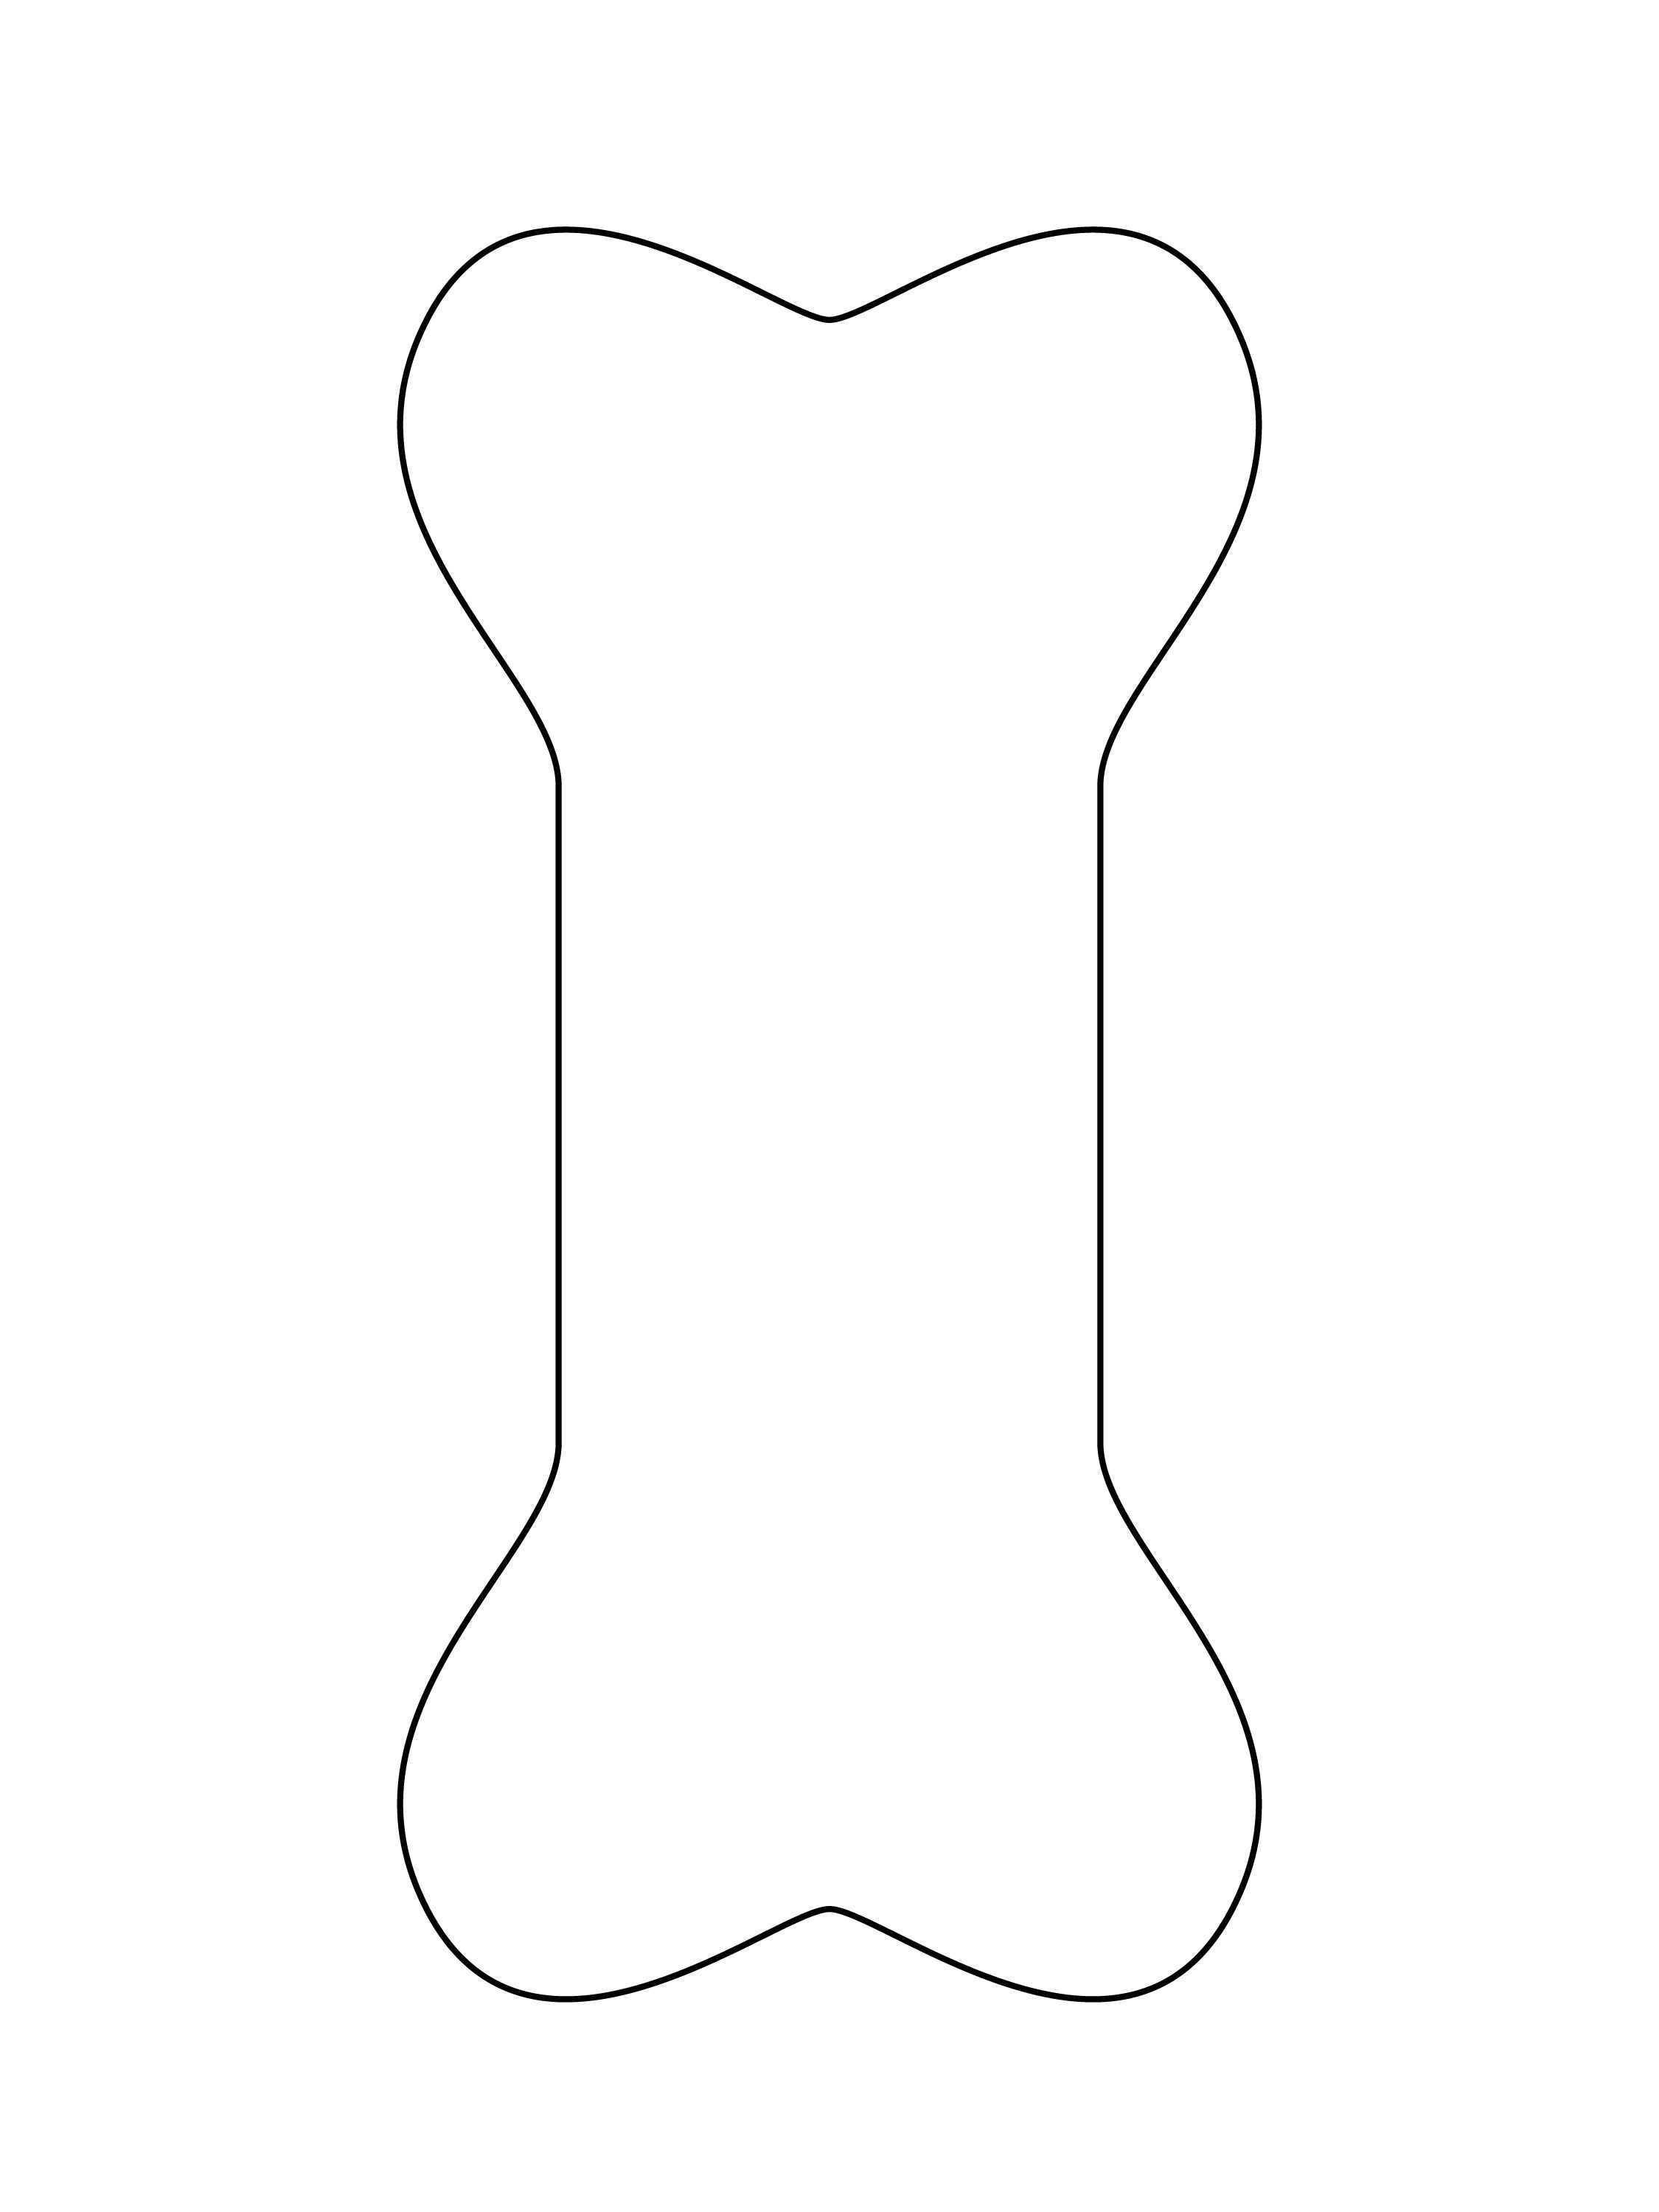
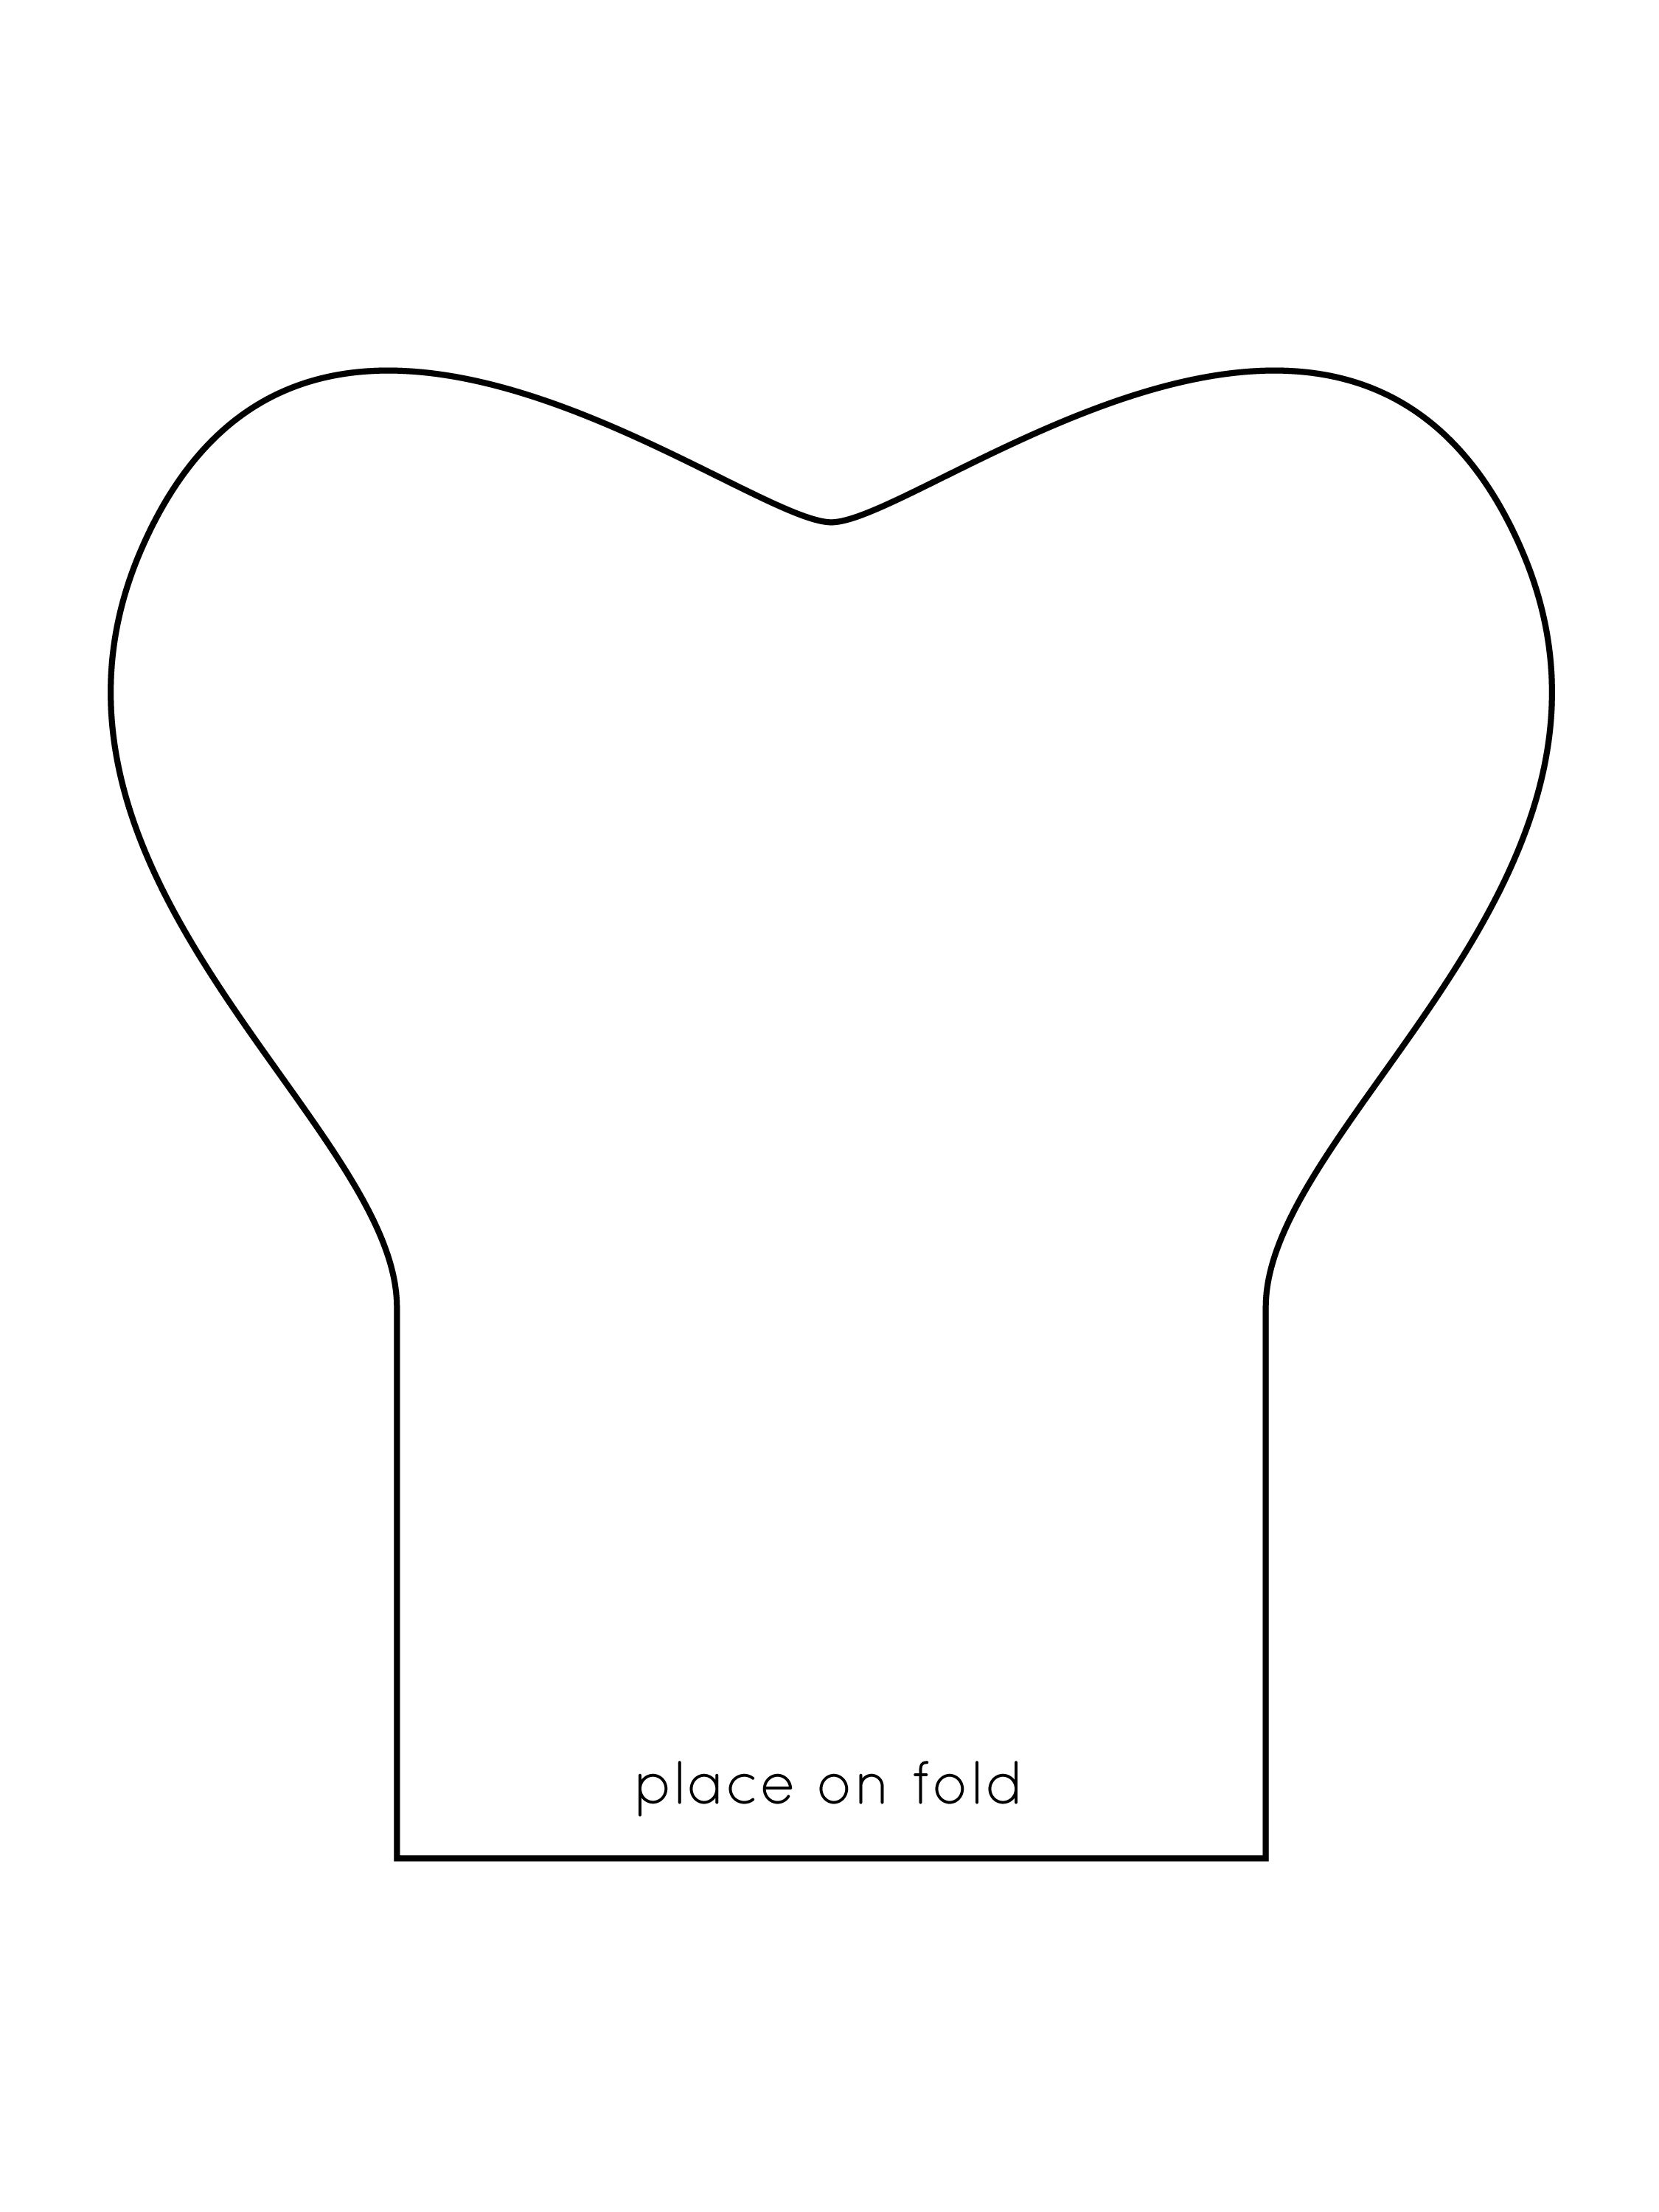
Print the Dog Bone Pattern and Cut the Fabric
Download either the Small Dog Bone Toy Pattern JPG or the Large Dog Bone Toy Pattern JPG. Print the pattern of your choice on plain paper at 100%. Then, cut out the pattern.
Using two layers of the outer fabric, pin the pattern piece to the fabric, keeping the dog bone shape straight on the grain of the fabric. If you're making the large dog bone, place the straight edge of the template on the fold. And if you're working with thicker fabric, such as sherpa, it's best to cut only one piece at a time.
Cut out the dog bone shape. Next, repeat with the inner fabric, so you end up with two outside pieces and two inside pieces.
![dog bone toy pieces]()
The Spruce / Mollie Johanson -
Layer and Pin the Fabric
Layer the pieces with the right sides of the outer fabric together. Sandwich those with an inner fabric piece on each side.
Pin the fabric, so all of the edges are aligned and held in place. Mark an area to be left open by pinning one of the straight edges with a pin parallel to the edge. This pin will serve as a reminder to stop sewing, so you'll have an opening to turn the fabric.
![dog bone toy layers with pins]()
The Spruce / Mollie Johanson -
Sew the Dog Bone and Clip the Seam Allowance
Using a scant 1/4-inch seam allowance, sew the edges of the bone, leaving your marked opening unsewn. Backstitch at the start and end.
Pivot and turn where necessary to maintain a seam that is an even distance from the edge of the fabric.
Clip the seam allowance at all curves, so the fabric will lie smooth when it's turned right side out. Be careful to clip just to the sewn seam without clipping the stitches.
To maintain a strong seam, clip the layers separately. Clip one layer, and move a short distance from that to clip the second layer of the seam allowance.
![clipping curves of dog bone toy]()
The Spruce / Mollie Johanson -
Turn, Stuff, and Close the Bone
Turn the fabric right side out through the opening. Turn in the opening seam allowance, and finger press the opening seam line.
Finger press the edges, and push all seams to the edge of the fabric.
Next, stuff the bone, adding small amounts of stuffing at a time. Fill in the ends first and then the middle. If you are adding the small rattle container in the middle, be sure to work the stuffing all around it.
![stuffing dog bone toy]()
The Spruce / Mollie Johanson -
Sew the Opening of the Dog Bone Closed
Use a doubled thread and a slip stitch to close the opening securely. Now, your dog can enjoy their new toy.
If your dog tends to destroy toys, pay attention to how this dog bone is wearing. If it starts to tear and stuffing is coming out, take it away to keep your pet safe and prevent any choking hazards.
![stitching the dog bone toy]()
The Spruce / Mollie Johanson
:max_bytes(150000):strip_icc()/DogBoneToy2-5a9b16cb3de4230037def3c4.jpg)
:max_bytes(150000):strip_icc()/DogBoneToy3-5a9b16e43128340037852d8b.jpg)
:max_bytes(150000):strip_icc()/DogBoneToy4-5a9b16f5ff1b78003635c3ae.jpg)
:max_bytes(150000):strip_icc()/DogBoneToy5-5a9b17083de4230037defa4e.jpg)
:max_bytes(150000):strip_icc()/DogBoneToy6-5a9b171b6edd650036cf8522.jpg)
:max_bytes(150000):strip_icc()/materials-52d8ae4e4ab44806810c5dfd2e95a2dc.jpg)
:max_bytes(150000):strip_icc()/hero-3a52b3b549b0462e95f2cb093a6ae9a2.jpg)
:max_bytes(150000):strip_icc()/extrahero-5c4755b146e0fb0001b50904.jpg)
:max_bytes(150000):strip_icc()/hero-5ba3f551c9e77c005042246c.jpg)
:max_bytes(150000):strip_icc()/bakedpotatoebagfinished-56b70bf43df78c0b135d662d.jpg)
:max_bytes(150000):strip_icc()/dog-coat-1144641_1920-58e6a4405f9b58ef7efb573e.jpg)
:max_bytes(150000):strip_icc()/ToothFairyPillow1-5a872ca1c673350037be4c2e.jpg)
:max_bytes(150000):strip_icc()/Item4DipDyeLeash-5b3c478b46e0fb00379def3c-5b413d6cc9e77c00376b6b08.jpg)
:max_bytes(150000):strip_icc()/MiniTravelNeckPillow1-361d721b2c5e4aeb9f3b05e2b0da1b7b.jpg)
:max_bytes(150000):strip_icc()/StuffedPumpkin1-59dbc9f103f40200104a6e86.jpg)
:max_bytes(150000):strip_icc()/CatnipMouseCatToy1-5ab2c31c119fa80037eef032.jpg)
:max_bytes(150000):strip_icc()/Sunhat2-5abe95f33418c60037f5cc3b.jpg)
:max_bytes(150000):strip_icc()/FoldoverBackpack19-a518ef2e75d049f9ba5dd6773f94e7dd.jpg)
:max_bytes(150000):strip_icc()/KnittingBag1-5b92a4ddc9e77c002ca5d8a0.jpg)
:max_bytes(150000):strip_icc()/ClothespinBag6-5a96f94518ba01003704ed2a.jpg)
:max_bytes(150000):strip_icc()/BBQApron1-5b032970fa6bcc00363d718b.jpg)